When it comes to growing healthy and bountiful crops, understanding the soil beneath your feet is key. Soil fertility plays a pivotal role in determining the success of your garden or farm. To unlock its secrets, we delve into the fascinating world of soil fertility evaluation through chemical methods. In this comprehensive guide, we demystify the science behind it and equip you with the knowledge needed to make informed decisions for better harvests.
What is Soil Fertility?
Soil fertility refers to the soil’s ability to provide essential nutrients to plants in the right quantities and proportions. It’s like a buffet for plants, where they can pick and choose the nutrients they need for growth. To evaluate soil fertility, we turn to chemical methods, which allow us to determine the soil’s nutrient content accurately.

The Importance of Soil Fertility Evaluation
Soil, the humble foundation of our agriculture and ecosystems, plays a vital role in shaping the health and productivity of our planet. At the heart of understanding and nurturing soil lies the concept of soil fertility. Soil fertility evaluation, particularly through chemical methods, is a critical practice with profound implications for agriculture, environmental stewardship, and sustainable food production. In this article, we’ll explore the compelling reasons why soil fertility evaluation is of paramount importance.
1. Optimizing Crop Yields
One of the most immediate and practical benefits of soil fertility evaluation is its impact on crop yields. Fertile soil provides the essential nutrients that plants need to grow and thrive. By analyzing the chemical composition of the soil, farmers and gardeners can tailor their cultivation practices to match the specific needs of their crops.
For example, if a soil test reveals a deficiency in a particular nutrient like phosphorus, the farmer can apply the appropriate fertilizer to correct the imbalance. Conversely, if certain nutrients are present in excess, steps can be taken to mitigate potential issues. This precision in nutrient management translates directly into healthier plants and higher yields, ensuring food security and economic stability.
2. Efficient Nutrient Management
In an era where sustainability and resource conservation are paramount, efficient nutrient management cannot be overstated. Chemical methods of soil fertility evaluation provide precise information about the nutrient content of the soil. Armed with this data, farmers can avoid the over-application of fertilizers, which not only saves them money but also prevents nutrient runoff into water bodies.
Excessive nutrient runoff, particularly nitrogen and phosphorus, can lead to water pollution and the formation of harmful algal blooms. By practicing judicious nutrient management based on soil test results, we can protect our water resources and mitigate the environmental impacts of agriculture.
3. Environmental Stewardship
Soil fertility evaluation is a cornerstone of responsible agriculture and environmental stewardship. It allows us to make informed decisions that minimize the environmental footprint of farming practices. By applying only the nutrients that are required and ensuring that the soil’s pH levels are optimal, we reduce the risk of nutrient leaching and soil erosion.
Furthermore, chemical methods help us identify soil contaminants such as heavy metals, which can pose a threat to both human health and the environment. Early detection of these contaminants enables us to take remedial actions, preventing their spread and potential harm.
4. Tailoring Soil Management Practices
Soil fertility evaluation is not a one-size-fits-all solution. Different crops have varying nutrient requirements, and soils exhibit unique characteristics. By conducting regular soil tests, farmers and land managers can tailor their soil management practices to suit their specific needs.
For instance, acidic soils may require lime to adjust their pH levels, making them more conducive to certain crops. Understanding the soil’s nutrient-holding capacity (Cation Exchange Capacity or CEC) aids in determining the appropriate fertilizer application rates.
5. Sustainable Agriculture
Sustainability is the buzzword of modern agriculture. Soil fertility evaluation is a linchpin of sustainable farming practices. By maintaining soil health and fertility, we can reduce the need for chemical inputs, improve the resilience of crops to pests and diseases, and ensure the long-term productivity of our farmlands.
In a world where climate change and resource scarcity are challenges we face, sustainable agriculture practices are not just beneficial but essential.
Soil fertility evaluation through chemical methods is a powerful tool that underpins the success of agriculture, promotes responsible environmental stewardship, and contributes to sustainable food production. It allows us to unlock the potential of our soils, ensuring that they continue to support life and nourish our planet for generations to come.
Now, let’s dive into the chemical methods used for soil fertility evaluation.
Chemical Methods of Soil Fertility Evaluation
1. pH Testing
Testing: Unveiling the Soil’s Acidity-Alkalinity Balance
When it comes to soil health and plant growth, pH is a small yet mighty number. This unassuming metric reveals a lot about the soil’s chemistry and can significantly impact the success of your gardening or farming endeavors. In this article, we’ll delve into the world of pH testing in soil, demystifying its importance, the science behind it, and how to effectively use this information for better crop yields.

Understanding pH: The Basics
pH stands for “potential of hydrogen” and measures the acidity or alkalinity of a substance, in our case, soil. The pH scale ranges from 0 to 14, with 7 being neutral. Values below 7 indicate acidity, while values above 7 indicate alkalinity. So, why is this number so crucial for your soil?

pH and Nutrient Availability
The pH level of soil profoundly influences the availability of essential nutrients to plants. Each nutrient has an optimal pH range at which it is most accessible to plant roots. Here’s how pH affects nutrient availability:
- Acidic Soil (pH < 7): In acidic soils, nutrients like phosphorus, iron, and manganese become more available to plants. However, excessively acidic soil can make aluminum and hydrogen ions toxic, potentially harming plant roots.
- Neutral Soil (pH = 7): While neutral pH is ideal for some plants, it’s essential to note that most crops prefer slightly acidic to neutral soils (pH 6-7).
- Alkaline Soil (pH > 7): Alkaline soils can limit the availability of essential nutrients like iron, phosphorus, and zinc, leading to nutrient deficiencies in plants.
The Impact of pH on Plant Health
The pH level of your soil directly affects the health and vitality of your plants. Here’s how:
- Nutrient Uptake: When pH is out of the optimal range for a specific plant, it struggles to absorb essential nutrients. This can result in stunted growth, yellowing leaves, and poor overall health.
- Microbial Activity: Soil pH also influences the activity of beneficial microorganisms in the soil. These microbes play a crucial role in breaking down organic matter and making nutrients available to plants. Extreme pH levels can disrupt their activity, impacting soil structure and fertility.
Conducting a pH Test
Now that we understand why pH matters let’s explore how to perform a pH test on your soil:
- Gather Soil Samples: Collect soil samples from various areas of your garden or field. Be sure to avoid areas with unusual conditions, such as near concrete or recently fertilized spots.
- Prepare the Samples: Air-dry the collected soil samples and remove any debris like rocks or roots. Crush the soil into a fine powder to ensure accurate results.
- Perform the Test: You can use a pH testing kit or send your samples to a soil testing laboratory for analysis. To do it yourself, mix the soil with distilled water and insert a pH testing probe or strip into the mixture. Follow the kit’s instructions for precise readings.
- Interpreting the Results: Your pH test will yield a number. Generally, values between 6 and 7 are ideal for most crops. However, specific plants may have different pH preferences, so it’s essential to consider what you intend to grow.
Adjusting Soil pH
If your pH test reveals that your soil is too acidic or too alkaline for your intended crops, don’t worry; you can take corrective measures:
- To Raise pH (Make Soil Less Acidic): Apply agricultural lime or dolomitic lime to increase soil pH gradually. Follow the recommended application rates on the lime package.
- To Lower pH (Make Soil More Acidic): Add elemental sulfur or aluminum sulfate to lower pH. Again, follow the package instructions for the correct application rate.
In the realm of soil health, pH testing is your passport to understanding and nurturing the soil’s acidity-alkalinity balance. By maintaining the optimal pH level, you ensure that your plants have access to the nutrients they need for robust growth and health. So, the next time you’re tending to your garden or fields, remember the power of pH and how it unlocks the potential of your soil.
2. Nutrient Analysis
Nutrient Analysis: Unlocking the Secrets of Soil Health
In the world of agriculture and gardening, the phrase “knowledge is power” couldn’t be truer. When it comes to nurturing plants and maximizing yields, understanding your soil’s nutrient composition is paramount. In this article, we’ll delve into the fascinating realm of nutrient analysis in soil, explaining its significance, the science behind it, and how this knowledge can be harnessed to cultivate thriving, productive gardens and farms.

The Nutrient Essentials
For plants to flourish, they require a range of essential nutrients, each playing a unique role in their growth and development. These nutrients can be broadly categorized into two groups:
- Macronutrients: These are needed in larger quantities and include:
- Nitrogen (N)
- Phosphorus (P)
- Potassium (K)
- Calcium (Ca)
- Magnesium (Mg)
- Sulfur (S)
- Micronutrients: These are needed in smaller quantities but are no less important. They include:
- Iron (Fe)
- Manganese (Mn)
- Copper (Cu)
- Zinc (Zn)
- Boron (B)
- Molybdenum (Mo)
The Role of Nutrient Analysis
Nutrient analysis is the process of quantifying the concentration of these essential elements in your soil. Here’s why it matters:
- Customized Fertilization: By knowing the nutrient levels in your soil, you can tailor your fertilization practices to meet your specific plants’ needs. If your soil test reveals a deficiency in phosphorus, for instance, you can apply a phosphorus-rich fertilizer to address the imbalance.
- Preventing Nutrient Imbalances: Excessive levels of certain nutrients can be as detrimental as deficiencies. Nutrient analysis helps you identify and rectify imbalances before they impact plant health or result in environmental issues.
- Cost Efficiency: Applying fertilizers indiscriminately can be costly and environmentally unsound. Nutrient analysis allows you to use fertilizers judiciously, reducing waste and expenses.
Conducting Nutrient Analysis
So, how do you go about analyzing the nutrient composition of your soil? Here’s a simplified guide:
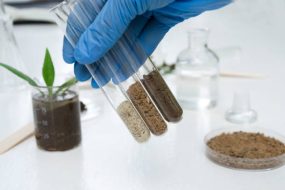
- Soil Sampling: Collect representative soil samples from your garden or field. Ensure you take samples from different areas to account for variability.
- Sample Preparation: Air-dry the soil samples and remove any debris like rocks or roots. Crush the soil into a fine powder to ensure accurate results.
- Laboratory Analysis: You can send your samples to a soil testing laboratory for professional analysis. They will use chemical techniques to determine nutrient concentrations accurately.
- Interpreting the Results: Once you receive your soil test report, it will provide information on nutrient levels, pH, and other relevant data. Pay attention to nutrient levels and compare them to recommended ranges for your target crops.
Applying Nutrient Analysis Findings
Interpreting nutrient analysis results is crucial, but it’s equally important to take action based on those findings:
- Fertilization: If nutrient levels are deficient, choose fertilizers or soil amendments that provide the lacking nutrients. Follow recommended application rates to avoid over-fertilization.
- Avoiding Excess: Be cautious not to apply excessive amounts of nutrients. This can lead to nutrient runoff and environmental issues. Nutrient analysis helps you apply only what’s needed.
- Crop Selection: Based on your soil’s nutrient profile, consider planting crops that thrive in those conditions. Some plants are more adaptable to nutrient-poor soils, while others require richer soils.
Nutrient analysis in soil is the key to unlocking the full potential of your garden or farm. Armed with knowledge about your soil’s nutrient composition, you can make informed decisions about fertilization, plant selection, and overall soil management. This, in turn, leads to healthier, more productive plants and contributes to sustainable and responsible agriculture practices. So, whether you’re a seasoned farmer or a gardening enthusiast, embrace the power of nutrient analysis to nurture your soil and reap bountiful rewards.
3. Cation Exchange Capacity (CEC)
Cation Exchange Capacity (CEC): Unveiling the Soil’s Nutrient Holding Power
In the intricate world of soil science, Cation Exchange Capacity (CEC) is a crucial term that holds the key to understanding how soils retain and provide essential nutrients to plants. In this article, we will delve into the significance of CEC, the science behind it, and how it plays a pivotal role in soil fertility and sustainable agriculture.
Deciphering Cation Exchange Capacity (CEC)
Cation Exchange Capacity (CEC) is a measure of a soil’s ability to hold and exchange cations, which are positively charged ions. These cations include essential nutrients like calcium (Ca²⁺), magnesium (Mg²⁺), potassium (K⁺), and ammonium (NH₄⁺), among others. Understanding CEC is like peering into the soil’s treasure chest of nutrients, revealing its potential to nourish plants.
The Role of CEC in Soil Fertility
CEC influences soil fertility in several critical ways:
- Nutrient Retention: Soils with high CEC can retain a greater quantity of essential nutrients, making them available for plant uptake. This is especially vital in regions with frequent rainfall, as nutrients are less likely to leach away.
- Nutrient Availability: CEC also determines the availability of cations to plants. The exchange sites on soil particles act like a bank, releasing nutrients as needed by plant roots. Soils with higher CEC have more “savings” to draw from, ensuring a steady supply of nutrients to plants.
- pH Buffering: Soils with higher CEC tend to resist rapid changes in pH. This buffering capacity can help maintain a stable and favorable pH level for plant growth, as excess acidity or alkalinity is gradually neutralized.
Measuring Cation Exchange Capacity
Determining a soil’s CEC involves laboratory analysis, as it requires specialized equipment and chemical reagents. Here’s a simplified overview of the process:
- Soil Sampling: Collect representative soil samples from your gardening or farming area. Ensure that the samples are well-mixed to account for any variations in soil composition.
- Sample Preparation: Remove any debris and stones from the soil samples. Air-dry and grind them into a fine powder.
- Laboratory Analysis: Take the prepared samples to a soil testing laboratory. There, professionals will use a variety of chemical solutions to exchange cations on the soil particles and determine the CEC.
- Interpreting the Results: The soil test report will provide the CEC value in milliequivalents per 100 grams of soil (meq/100g). Typically, higher values indicate better nutrient-holding capacity.
Applying CEC Information
Understanding your soil’s CEC can lead to more informed and effective soil management decisions:
- Nutrient Management: High CEC soils can hold more nutrients, reducing the need for frequent fertilizer applications. Conversely, low CEC soils may require more frequent nutrient supplementation.
- pH Management: Knowing the CEC can help you choose the right amendments to adjust soil pH. Soils with high CEC are less prone to pH fluctuations, but amendments may be needed for specific crops.
- Crop Selection: Some crops are better suited to soils with particular CEC levels. Understanding your soil’s CEC can guide you in selecting the most suitable crops for your gardening or farming venture.
Cation Exchange Capacity (CEC) might sound complex, but its importance in soil fertility and plant nutrition cannot be overstated. By unraveling the soil’s nutrient-holding power through CEC analysis, you gain valuable insights into how to maximize crop yields while minimizing environmental impacts. Embrace the science of CEC, and you’ll be one step closer to cultivating thriving gardens and sustainable farms that nourish both people and the planet.
4. Organic Matter Content
Organic Matter Content: The Lifeblood of Healthy Soil
In the world of soil science, organic matter is like the secret ingredient that transforms ordinary soil into a fertile, life-sustaining ecosystem. In this article, we’ll explore the importance of organic matter content in soil, its role in supporting plant growth, and how you can boost this vital component for thriving gardens and sustainable agriculture.
The Essence of Organic Matter
Organic matter in soil is composed of decomposed plant and animal material. It’s often referred to as the “black gold” of agriculture because of its immense value. Organic matter includes things like dead leaves, roots, crop residues, and the byproducts of soil organisms. This organic material gradually breaks down over time, releasing nutrients and improving soil structure.
The Role of Organic Matter in Soil
Organic matter in soil plays multiple essential roles:
- Nutrient Reservoir: Organic matter serves as a nutrient bank for plants. It contains essential elements like nitrogen, phosphorus, and potassium, slowly releasing them as plants need them. This nutrient-rich reservoir reduces the need for synthetic fertilizers.
- Soil Structure Improvement: Organic matter binds soil particles together, creating aggregates. These aggregates improve soil structure by enhancing water infiltration, aeration, and root penetration. Well-structured soil is less prone to erosion and compaction.
- Water Retention: Organic matter acts like a sponge, helping soil retain moisture. It prevents excessive water drainage and evaporation, ensuring that plants have a steady water supply even during dry periods.
- Microbial Habitat: Soil microorganisms, including beneficial bacteria and fungi, thrive in organic matter-rich environments. These microbes contribute to nutrient cycling, disease suppression, and overall soil health.
Measuring Organic Matter Content
Determining the organic matter content in your soil typically requires laboratory analysis. However, you can get a rough estimate using a simplified method:
- Collect a Soil Sample: Take a representative soil sample from your garden or field. Ensure it’s free of debris and stones.
- Air-Dry the Sample: Spread the soil sample in a thin layer and allow it to air-dry completely. This may take a few days to a week, depending on the weather.
- Weigh the Sample: Weigh the dry soil sample.
- Burn the Organic Matter: Place the dried soil sample in a heat-resistant container and carefully burn off the organic matter. What remains is the mineral fraction of the soil.
- Weigh the Residue: Weigh the residue left after burning.
- Calculate Organic Matter Content: Subtract the weight of the residue from the weight of the dried soil sample. The difference represents the organic matter content.
Enhancing Organic Matter in Soil
Increasing organic matter content is a goal for gardeners and farmers seeking to improve soil fertility and structure. Here’s how you can do it:

- Organic Amendments: Add compost, well-rotted manure, or cover crops to your soil. These organic materials break down over time, enriching the soil with valuable nutrients and organic matter.
- Reduced Tillage: Minimize soil disturbance through reduced tillage or no-till farming practices. Excessive tilling can accelerate the decomposition of organic matter.
- Crop Rotation: Rotate your crops to prevent the depletion of specific nutrients and maintain a diverse mix of organic materials in the soil.
- Mulching: Apply mulch to the soil surface to protect organic matter from erosion and maintain consistent moisture levels.
Organic matter content is the lifeblood of healthy soil. By nurturing this essential component, you create an environment where plants can thrive, reduce the need for synthetic inputs, and contribute to sustainable and responsible agriculture. So, whether you’re tending to a garden or managing a farm, remember that the road to fertile soil starts with embracing the power of organic matter.
5. Salinity Testing
Salinity Testing: Balancing Soil Health for Thriving Crops
In the world of agriculture, salinity is a hidden adversary that can quietly undermine your efforts to grow healthy crops. Salinity testing is the key to unveiling this invisible threat and ensuring that your soil remains fertile and productive. In this article, we’ll explore the significance of salinity testing, the science behind it, and how to manage soil salinity effectively.
Understanding Soil Salinity
Soil salinity refers to the concentration of salts (usually sodium, calcium, and magnesium) dissolved in the soil water. These salts can originate from natural sources, such as mineral weathering, or from human activities like irrigation and excessive fertilizer use. High salinity levels can have detrimental effects on plant growth and soil quality.

The Impact of Soil Salinity
Excessive soil salinity poses several challenges to plant growth and soil health:
- Water Stress: Salts in the soil pull water away from plant roots, making it harder for plants to take up water. This leads to water stress and reduced crop yields.
- Nutrient Imbalances: High salinity can interfere with nutrient uptake by plants, causing nutrient imbalances and deficiencies. It can also lead to the accumulation of toxic ions like sodium.
- Soil Structure Degradation: Salts can disrupt soil structure, causing it to become compacted and less permeable. This affects water infiltration and root growth.
The Role of Salinity Testing
Salinity testing is a critical tool for assessing the salt content in your soil. It provides valuable information about the extent of salinity and helps you make informed decisions to manage it effectively. Here’s how salinity testing works:
- Soil Sampling: Collect soil samples from your garden or field, ensuring they represent different areas. Use a soil auger or corer to collect samples from various depths.
- Laboratory Analysis: Take the soil samples to a soil testing laboratory or use a portable salinity meter if available. The laboratory will measure the electrical conductivity (EC) of the soil extract, which is a proxy for salinity.
- Interpreting Results: The salinity test results will typically be expressed in units like deciSiemens per meter (dS/m) or milliSiemens per centimeter (mS/cm). Higher values indicate higher salinity levels.
Managing Soil Salinity
If your soil salinity test reveals elevated salt levels, don’t fret. Effective management strategies can help mitigate the effects of salinity:
- Leaching: Leaching involves applying excess water to the soil to wash away salts from the root zone. Proper drainage systems are essential for effective leaching.
- Salt-Tolerant Crops: Consider planting salt-tolerant crop varieties that can thrive in moderately saline conditions.
- Avoid Over-Irrigation: Over-irrigation can lead to salt accumulation in the soil. Implement efficient irrigation practices to prevent this.
- Soil Amendments: Certain soil amendments, like gypsum (calcium sulfate), can help improve soil structure and displace harmful sodium ions.
Salinity testing is your compass for navigating the challenges of salt-affected soil. By understanding the salt content in your soil, you can implement strategies to prevent crop losses, maintain soil health, and ensure sustainable agriculture. So, the next time you tend to your garden or farm, remember the importance of salinity testing in creating a thriving and productive agricultural environment.
6. Micronutrient Analysis
Micronutrient Analysis: Nurturing Your Soil for Optimal Crop Health
When it comes to growing healthy crops, it’s not just about the major nutrients like nitrogen and phosphorus. Micronutrients, often referred to as trace elements, are equally vital for plant growth and development. In this article, we’ll dive into the world of micronutrient analysis in soil, exploring the significance of these tiny but crucial elements, the science behind them, and how to ensure your crops get the micronutrients they need.
The Importance of Micronutrients
Micronutrients are essential elements required by plants in small quantities, but their absence or deficiency can have a profound impact on plant health. The primary micronutrients include:
- Iron (Fe): Essential for photosynthesis and chlorophyll production.
- Manganese (Mn): Involved in photosynthesis and enzyme activation.
- Copper (Cu): Necessary for electron transport in photosynthesis.
- Zinc (Zn): Vital for enzyme function and overall plant growth.
- Boron (B): Required for cell division and pollination.
- Molybdenum (Mo): Essential for nitrogen metabolism.
The Role of Micronutrient Analysis
Micronutrient analysis in soil serves several crucial purposes:
- Detecting Deficiencies: Soil testing can reveal if your soil lacks specific micronutrients, allowing you to take corrective actions before deficiencies impact plant health.
- Precision Fertilization: Knowing the micronutrient status of your soil enables you to apply targeted micronutrient fertilizers, avoiding unnecessary expenses and potential environmental issues.
- Crop-Specific Solutions: Different plants have varying micronutrient requirements. Micronutrient analysis helps you tailor your approach based on the crops you’re cultivating.
Conducting Micronutrient Analysis
To perform micronutrient analysis on your soil, follow these steps:
- Soil Sampling: Collect soil samples from your garden or field, ensuring they represent the entire area. Use a soil auger or corer to collect samples from different depths.
- Sample Preparation: Remove debris and rocks from the soil samples. Air-dry the samples and crush them into a fine powder.
- Laboratory Analysis: Take the prepared samples to a soil testing laboratory. Professionals will use specialized chemical solutions to determine the concentration of micronutrients accurately.
- Interpreting Results: The soil test report will provide micronutrient levels in parts per million (ppm). Compare these levels to the recommended ranges for your specific crops.
Applying Micronutrient Analysis Findings
Interpreting the results of micronutrient analysis is essential, but it’s equally important to take action based on those findings:
- Micronutrient Fertilization: If the test reveals deficiencies in specific micronutrients, apply appropriate micronutrient fertilizers as recommended by the soil test report.
- Avoiding Excess: While micronutrients are essential, overapplication can lead to toxicity. Follow recommended application rates to prevent harm to plants.
- Crop Selection: Consider planting crops that are less demanding in terms of specific micronutrients if your soil has chronic deficiencies.
- pH Management: Soil pH can influence micronutrient availability. Adjusting soil pH, if necessary, can enhance micronutrient uptake.
Micronutrient analysis is your roadmap to ensuring that your plants receive the essential trace elements they need for robust growth and health. By harnessing the power of micronutrient analysis, you can cultivate thriving gardens and farms, optimize crop yields, and contribute to sustainable and responsible agriculture. So, the next time you’re nurturing your soil, remember the significance of micronutrients in nurturing your crops.
How to Conduct Soil Fertility Evaluation
How to Conduct Soil Fertility Evaluation: A Step-by-Step Guide
Soil fertility evaluation is a fundamental practice for anyone involved in agriculture or gardening. It provides valuable insights into your soil’s nutrient content, pH, and overall health. Conducting a soil fertility evaluation involves a series of steps to ensure accurate results. In this guide, we’ll walk you through the process step by step.

Step 1: Determine the Purpose
Before you begin, clarify your objectives. Are you evaluating soil fertility for a specific crop, garden bed, or landscaping project? Understanding your goals will help you tailor the evaluation to your specific needs.
Step 2: Collect Soil Samples
Accurate soil sampling is crucial. Follow these guidelines:
- Select Sampling Sites: Identify representative areas in your garden or field. Consider variations in soil type, topography, and historical land use.
- Use Clean Tools: Use a clean, stainless steel soil probe or shovel to collect samples. Avoid tools that may contaminate the samples.
- Sample Depth: For most crops and gardens, collect samples from the top 6-8 inches (15-20 cm) of soil. For trees and deep-rooted crops, sample at various depths.
- Sample Quantity: Collect multiple samples from each sampling site and mix them thoroughly to create a composite sample. This ensures a representative analysis.
Step 3: Prepare Soil Samples
Prepare the collected soil samples for testing:
- Air-Dry: Spread the samples on a clean surface to air-dry. Avoid direct sunlight or high heat, as this can alter the soil’s properties.
- Remove Debris: Remove stones, roots, and any visible debris from the dried samples.
- Grind to Powder: Crush the dried soil into a fine powder using a mortar and pestle or a clean, dedicated grinder.
Step 4: Choose a Testing Method
Decide whether you will conduct the soil fertility evaluation yourself using a home testing kit or send your samples to a professional laboratory. Laboratory tests are more accurate and comprehensive, while home kits offer convenience for basic assessments.
Step 5: Conduct the Soil Tests
If you choose to use a home testing kit, follow the manufacturer’s instructions for each test you plan to perform. Common soil tests include pH testing, nutrient analysis, and organic matter content.
For laboratory testing:
- Select a Reputable Lab: Choose a certified soil testing laboratory. Contact your local agricultural extension office for recommendations or search online.
- Package and Label Samples: Package the soil samples securely in labeled containers provided by the lab. Include information about the sampling sites and your objectives.
- Submit Samples: Deliver or ship the samples to the lab as instructed. Note any specific tests you want to be conducted.
Step 6: Interpret the Results
Once you receive the soil test results, review them carefully. Look for information about pH levels, nutrient concentrations, organic matter content, Cation Exchange Capacity (CEC), and any other parameters tested. Pay attention to nutrient recommendations for your intended crops.
Step 7: Implement Recommendations
Based on the test results and recommendations provided, adjust your soil management practices:
- Apply fertilizers or soil amendments as recommended to correct nutrient deficiencies or imbalances.
- Adjust pH levels if necessary using lime or sulfur.
- Incorporate organic matter into the soil to improve structure and fertility.
- Consider crop selection based on soil characteristics and nutrient availability.
Step 8: Monitor and Repeat
Soil fertility is not static; it can change over time. Regularly monitor your soil’s health and fertility by conducting soil fertility evaluations at least once a year or as needed. This ongoing assessment allows you to fine-tune your soil management practices and ensure the best possible conditions for your crops or garden.
Conclusion: Cultivating Success Through Soil Fertility Evaluation
In the intricate tapestry of agriculture and gardening, soil fertility evaluation emerges as a critical thread that weaves together the elements of knowledge, precision, and stewardship. From understanding the importance of soil pH to unraveling the secrets of micronutrients and the mysteries of Cation Exchange Capacity (CEC), each facet of soil fertility evaluation contributes to the nurturing of vibrant, productive ecosystems. Let’s recap the key takeaways from this exploration:
- Understanding Soil Health: Soil is not just dirt beneath our feet; it’s a dynamic living system. Soil fertility evaluation empowers us to decipher its mysteries and unlock its potential.
- pH Testing: The pH of your soil influences nutrient availability and plant health. Testing and adjusting pH levels are fundamental steps in soil fertility management.
- Nutrient Analysis: Soil is not one-size-fits-all. Nutrient analysis helps us tailor fertilization practices to meet the unique needs of different plants and soils.
- Cation Exchange Capacity (CEC): CEC reveals the soil’s ability to retain and release essential nutrients. Understanding CEC is like having the key to the soil’s nutrient vault.
- Organic Matter Content: Organic matter is the lifeblood of fertile soil. By nurturing this essential component, we improve soil structure, nutrient availability, and water retention.
- Salinity Testing: Soil salinity can be a hidden threat to plant health. Salinity testing unveils this adversary, allowing us to implement effective management strategies.
- Micronutrient Analysis: Micronutrients, though needed in small quantities, are essential for plant growth. Micronutrient analysis helps us ensure that plants receive these vital elements.
- Conducting Soil Fertility Evaluation: Conducting a soil fertility evaluation is a systematic process involving soil sampling, preparation, testing, result interpretation, and action based on recommendations.
- Continuous Monitoring: Soil fertility is not static. Regular monitoring and repeat evaluations enable us to adapt and refine our soil management practices over time.
In the world of agriculture and horticulture, soil is the canvas upon which we paint the story of sustenance and abundance. Soil fertility evaluation equips us with the knowledge and tools to craft this narrative with care and precision, ensuring that our fields and gardens yield bountiful harvests, while also fostering environmental stewardship and sustainability.
So, as you till the earth, remember that the journey of soil fertility evaluation is a journey of understanding, learning, and ultimately, reaping the rewards of a vibrant and resilient natural world. May your soil always be fertile, your crops abundant, and your commitment to responsible land stewardship unwavering.


One reply on “A Comprehensive Step-By-Step Guide to Evaluation of Soil Fertility Using Chemical Methods ”
[…] Read, Also >>>>>>> A Comprehensive Step-By-Step Guide to Evaluation of Soil Fertility Using Chemical Methods […]